Creating a product palette
To create a palette go to Plugins => Noptech => Product Palette => Manage Product Palette and click Add new button.
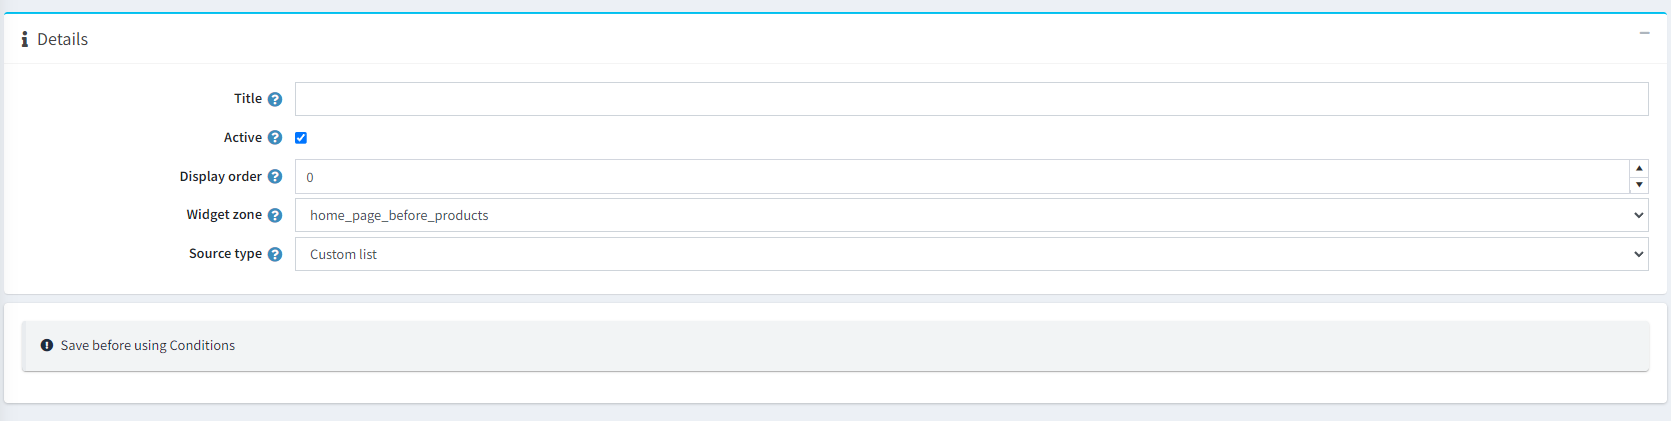
- Title: Title of the group.
- Active: Whether the group is active or not.
- Display order: The order of the group (used for sorting).
- Widget zone: The widget zone where the group will be shown in the public store.
-
Source type: Source type of the group. You have a couple of options, here are some of them:
- Predefined types: Firstly, you have some predefined values (e.g. 'Featured products, Marked as new, Best sellers and others).
- Category: Choose the products from specific category. Also you have the option to include products from sub-categories.
- Manufacturer: Choose the products from specific manufacturer.
- Vendor: Choose the products from specific vendor.
- Custom List: Specify the products that you want without restrictions and limitations. An Add products button will be available below 'Sorting method' field.
Add items to palette group
After you successfully created your product palette group, now is the time to add some actual products. Click on Add group item button.
Details
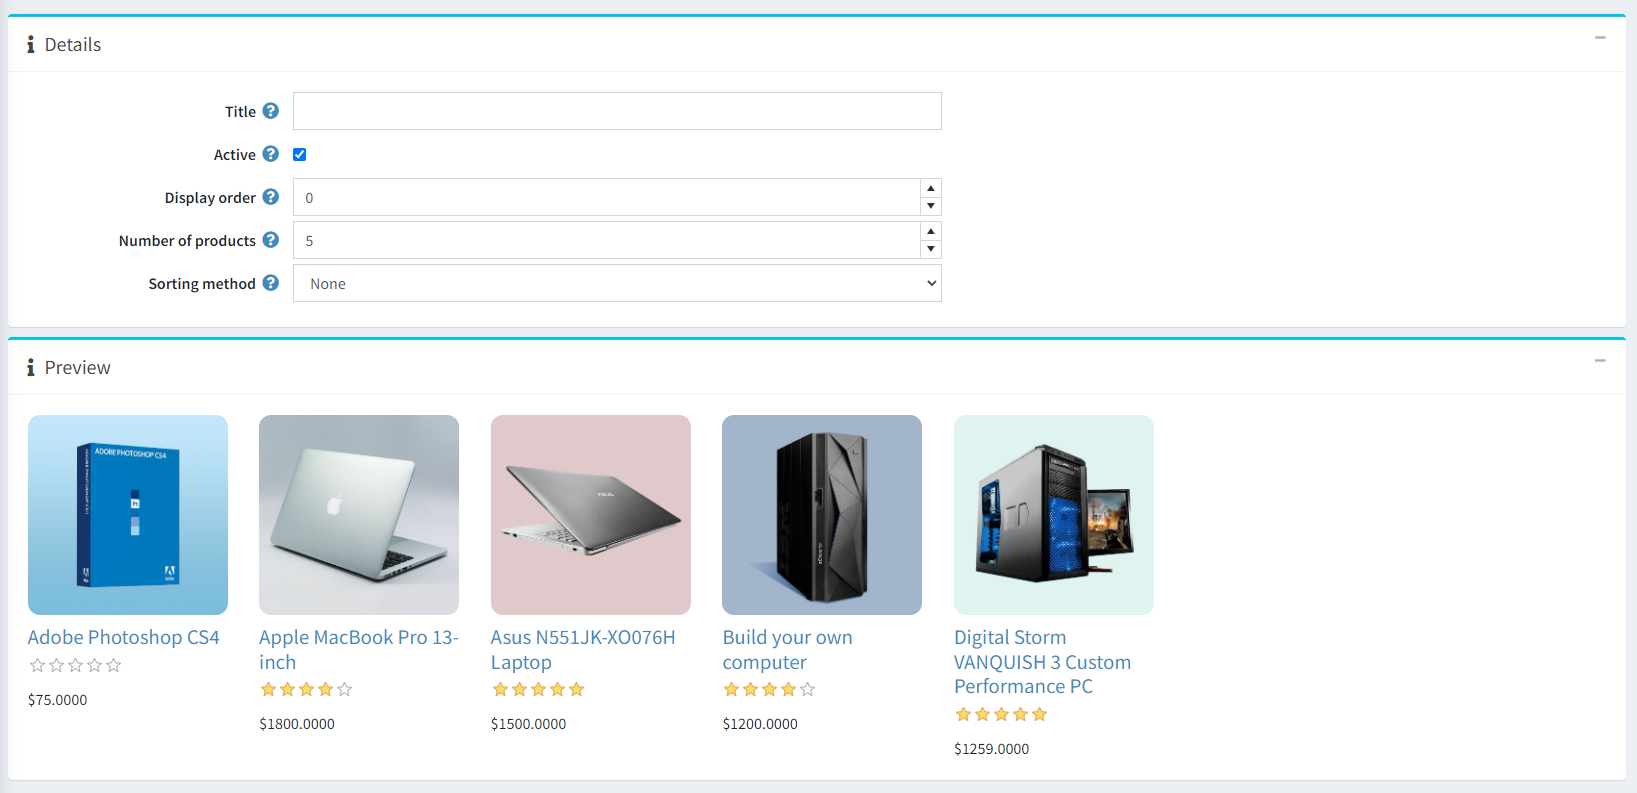
- Title: The title of the actual tab that will be loaded the products.
- Active: Whether the tab is active or not.
- Display order: Specifies the order of the tab (used for sorting).
- Number of products: The number of products that will be taken and visualized in the public store.
- Sorting method: Specifies the sorting method of the products (e.g. "By name", "By price").
Preview
In this window you can see the products that's actually will be visualized in your tab. (See the previous picture)
Note!
The example shows the products from Computers category with included products from sub-categories.
Note!
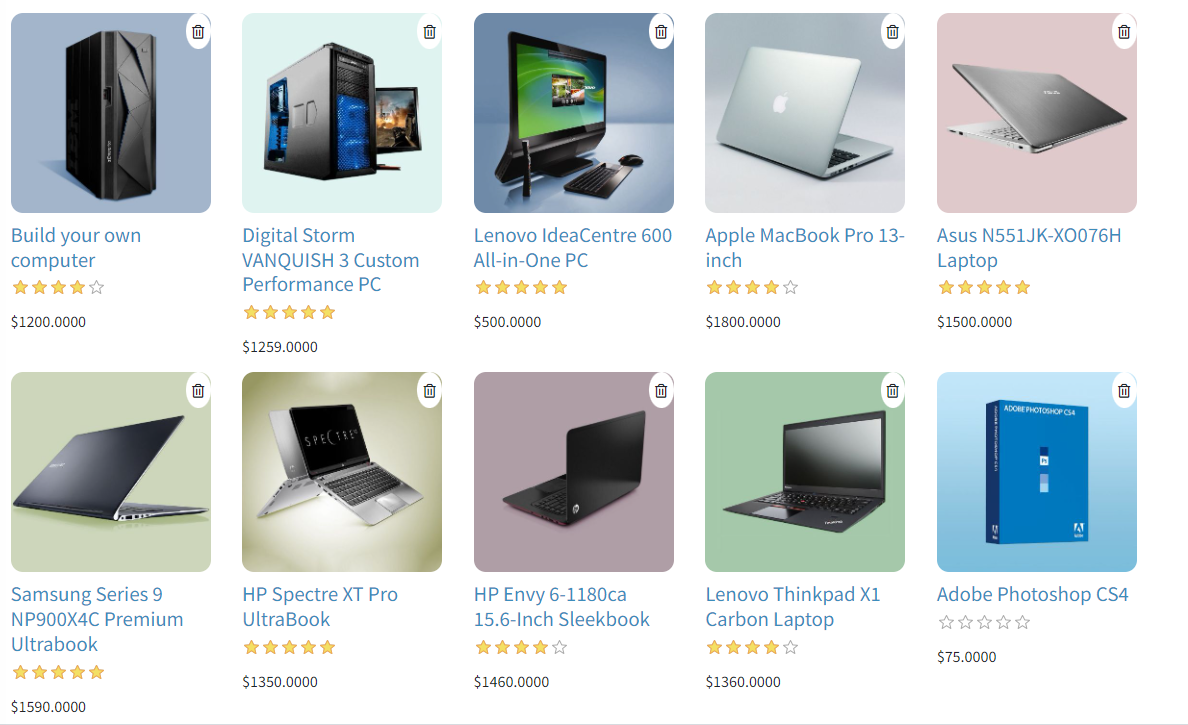
If you choose the source type of the group to Custom List you will have the ability to delete the products you want by clicking the "trash can" icon. (See the picture above)